Since the last time I’ve written, so many things have happened in my life and throughout the world. Isn’t that always the case? Life is never stagnate. That can be a good thing and it can be a scary thing … Continue reading
Since the last time I’ve written, so many things have happened in my life and throughout the world. Isn’t that always the case? Life is never stagnate. That can be a good thing and it can be a scary thing … Continue reading
I’m having a lot of fun this week! I found out about a fun contest through the San Diego Food Blogger Group where I could request specific items from the company Del Real Foods (http://www.delrealfoods.com/), they would send me the items free of charge, and I could play around with the ingredients in order to create a recipe and win some cash. Uh, yeah! I requested shredded chicken, carnitas, refried beans, and salsa and started playing around with quick recipe ideas. The only stipulation was that the recipe couldn’t take longer than 30 minutes. Not a problem, especially with the main ingredients precooked. You can vote for my recipe, Picante Pollo Sliders, here: http://www.delrealfoods.com/blogger-recipe-challenge/picante-pollo-sliders You are allowed to vote once a day through August 7th. Of course I would love to win the cash prize, but I must say it is really fun to see so many people supporting me. I keep watching the vote count go up every day, and that is just really cool!
I was having a couple of friends over for the Fourth of July, and I thought that would be a perfect testing ground for my first recipe idea. I love spicy food, but I love when flavors bounce around – spicy, then sweet, then back, then salty, then spicy – you get the idea. With that in mind, I decided on making sliders with a flavor explosion to mimic the fireworks later that evening;)
This is a keeper of a recipe! You can make the cucumber relish the day before, if you so choose. The longer the mix sits, the more intense the flavors will become, of course! The chicken mixture will come together quickly, but you can also keep it simmering on the stove for a good amount of time so that it thickens. Just keep an eye on it and occasionally stir. But if you don’t have a ton of time, no worries. Follow the recipe as is, but you may want to make sure more chicken than liquid makes it onto the slider so that it doesn’t become too soggy. Last note, this recipe makes a large serving. I like to be able to really pile the chicken mixture onto the slider, but you may not be so brash. If you have extra chicken mixture, either get more slider buns or you could mix up dinner the next night by cooking some penne and adding this chicken mixture in lieu of a traditional tomato sauce. That is exactly what I did, and then I added some lightly sautéed zucchinis. Why not? Go crazy!

This is how I received the chicken – perfectly cooked and shredded with zero fat. I felt spoiled!

The Fire Roasted Green Salsa was delicious in this recipe or even on its own!
Picante Pollo Sliders
Sweet and Spicy Cucumber Relish:
4 red jalapenos, chopped
1 cup unseasoned rice vinegar
3 garlic cloves, chopped
1 Tablespoon sugar
1 teaspoon grated fresh ginger
1 teaspoon sea salt
1 seedless cucumber, thinly sliced
1/2 cup white onion, thinly sliced
1/4 cup cilantro leaves, roughly chopped
Shredded Chicken Mixture:
2.5 pounds Del Real cooked, shredded chicken breast
32 ounces Del Real Salsa de Molcajete Verde
3 chipotle chiles in adobo, chopped
1 Tablespoon chili powder
1 package of dinner rolls, preferably Hawaiian Sweet
Cotija cheese, 5 ounces, crumbled

Now you can see all of the goodness!
At this point, I had Refried Beans and Carnitas (Roasted Pork) from Del Real Foods that I wanted to turn into even more goodness. I turned to another love for inspiration – pizza. Again, I only had 30 minutes from start to finish. I created, but opted not to enter into this into the contest, Cheesy Carnitas Pillows. Simply take 1 store-bought container of pizza dough and roll it out onto a prepared baking sheet. I sliced the dough into 10 equal rectangles. On the bottom row of 5 rectangles, I placed 1 slice of Jalapeno Monterey Jack, making sure the cheese did not hang off the edges. I spread 2 Tablespoons of refried beans on top of the cheese, then I topped that with 1/2 ounce of carnitas, and layered that with 3 pickled jalapeno slices. I simply took the top row of dough and placed them on top of the prepared dough rectangles, and then I crimped the edges to ensure no goodness would escape. I baked them for about 15 minutes, or until nice and golden, at 425 degrees. I served these little lovelies with salsa.

Thanks to everyone who has already voted, and feel free to continue to vote whenever you have a free moment! I greatly appreciate it!
Take Care and Happy Eating!
(Disclaimer: I did receive free items from Del Real Foods, but that in no way influenced how much I enjoyed my creations!)
Hello! I hope everyone is having a great week so far! I want to give you an update on a contest I’m entering. I just submitted one recipe to Del Real Foods (http://www.delrealfoods.com/about-us), and I will finish creating a second recipe later today for an additional recipe entry! That entry will be enjoyed by me and my husband later tonight:) The recipes have to take 30 minutes or less to make, and you can get Del Real Foods at Costco, or you can substitute the brand with whatever your grocery store has on hand. The voting will begin Saturday and will continue through August 7th, so I will post with more details on how to help me win this contest! Feel free to pass this along to all of your friends! Really, I won’t mind at all!

The beginning of something good!
Thank you in advance for your help! And I hope you enjoy my recipes!!
Take Care, Happy Eating, and Fingers Crossed!
So, I’m in a bad mood. I intended to tell you all about an awesome event I attend at Caffe Calabria in North Park last week with a bunch of San Diego Food Bloggers and Specialty Produce. I sat down to type away, but I’m in such a bad mood that I just sat there getting more upset about stuff going on in my life. So, I realized I need to cook. So, I’m making a White Chicken Chili, and I might even make a recipe I just came across, 2-Ingredient Nutella Brownies. So, I’m listening to fun music and cooking. I’m getting it together so that I can be human to my husband when he comes home. It’s working!
Part of my “Get in a Good Mood” music list:
And in memory of Chris Squire:
I need to get my “Weekend Mood” back! The recipes I’m making to put me back in a good mood:
White Chicken Chili: http://www.cookingclassy.com/2013/05/white-chicken-chili/

Starting my White Chicken Chili! Turn up the tunes!
2-Ingredient Nutella Brownies: http://www.thekitchn.com/how-to-make-2ingredient-nutella-brownies-cooking-lessons-from-the-kitchn-204550
I’m already feeling better! Fortunately, the issues causing my mood are not major and can be resolved, so I just need to cook a little more, dance and sing a lot more, and chill out!
Hope your Monday is going well!
Take Care and Happy Eating!
This has been an odd weather week in San Diego. And, yes, “odd weather week” is a very rare description for this part of the country. I still find it amusing when the weather forecasters tell us to buckle up for a major warm up. Usually that means we will go from 70 degrees to 73. What is truly pathetic is that I feel it, and I get annoyed with the “heat spell.” So whether you are in San Diego braving 73 degrees and some humidity blowing in from Cabo or you are in Cleveland, Ohio feeling a true summer warm up, you may want to avoid standing over or near your oven or stove. That is when the most easily loved appliance comes into play. I always thought of slow cooker meals being more for the winter season, but I’m loving it on these hot warmer days. Another huge benefit, the ability to walk away! So even if you are home, no need to tend to the pot! This truly is an easy lover. I’m pretty sure Phil was referring to a slow cooker.
I have two recipes that I really loved making (and eating) this week. The first might not sound so “Summery” especially due to the pumpkin addition, but I love Fall, and I already miss it. Yes, we get Fall in San Diego. It goes from 70 to 68. Leaves fall to the ground! Stop judging me! The first recipe caught my eye in the San Diego Union Tribune which was adapted from Michele Corbett’s site, http://www.cookingonthefrontburners.com. I made a few changes, but if you would like to see the original recipe, please check out Michele’s website. The second recipe is from Martha Stewart’s site, but I’ve made a couple of changes to the original recipe. For the original recipe, check out: http://www.marthastewart.com/341733/slow-cooker-greek-stuffed-peppers.
Meaty (or Not) Pumpkin Chili
16 oz ground sirloin (or ground turkey, or ground chicken, or tempeh, or tofu – You get the idea.)
1 Tablespoon grapeseed oil, if needed
1/2 cup chopped onion
1 cup chopped celery
1 chopped yellow, red, or orange pepper
3 cloves minced garlic
2 cups crushed tomatoes
4 ounces can diced green chilies
1 cup pumpkin pie filling (not puree)
1 cup chicken broth
2 Tablespoons chili powder
1/2 teaspoon pepper
1/2 teaspoon salt
15 oz can black beans rinsed and drained
Toppings – sour cream or Greek yogurt

Slow-Cooker Greek Stuffed Peppers
Slow-Cooker Greek Stuffed Peppers
5 large bell peppers
1 can (15 ounces) cannellini beans, rinsed and drained
1 cup crumbled feta (4 ounces)
1/2 cup quinoa (*You can really use any type of grain. Just don’t pre-cook the grain. Add it to the mix uncooked.)
4 scallions, thinly sliced
2 garlic clove, minced
1-2 teaspoon dried oregano
Spoonful of Sambal Oelek (*This really is to taste. I like food with a kick, so I put in a good amount. You can skip it all together if you prefer your meals on the mild side.)
Coarse salt and freshly ground pepper (*Make sure to go easy on the salt since feta is salty.)
Chicken stock or water, about 1/2 cup (*This is added to the bottom of the slow cooker to ensure the peppers do not stick. You just need enough liquid to coat the bottom, then the peppers are placed in the liquid upright.)
Lemon wedges, for serving
On another note, I purchased Organic Edamame Spaghetti at Costco last week. The only ingredients are water and edamame. I had to give it a try. The box has two recipes listed, both of which are very high in fat content. I opted to simply cook the spaghetti and serve it with a mushroom tomato sauce topped with Parmesan. I’m glad I tried it, but I will not buy it again. The flavor was not remarkable, but what really got me was the texture. It was spongy. I am left with a lot of the stuff, so I will use it, but I will stick to eating edamame the old-fashioned way – from the pod!

I hope everyone has a great week, and you can rest assured I will be fixated on the Cleveland Cavaliers capturing the NBA Finals trophy! Go Cavs! #allin
Take Care and Happy Eating!
Well, the breaking news story in San Diego is the rain, and with good reason! We need it. And when it comes, it brings some problems like flooding and car accidents. Ah, the drawbacks of living here. I’m taking a cue from my French Bulldog, Monsieur, and I decided to stay in and write. Actually, if I was taking his cue I would sleep all day on the sofa. He is living the dream. Also, he partied pretty hard last night at Thorn Street Brewery (http://thornstreetbrew.com/). He, like his parents, is a Cleveland Cavalier fan.

This week I noticed a delicious sounding recipe in the UT San Diego Food Section (May 13) that I will make, mostly likely on Sunday. I think Marrakesh Carrots from Joy the Baker would be a perfect side dish! http://joythebaker.com/2015/05/marrakesh-carrots/ If you haven’t stopped by her blog, you should.
Spelt and Lamb Meatballs 4 to 6 servings
4 scallions
1/4 cup parsley
1/4 cup dill sprigs, more for garnish
2 fat or 3 smaller garlic cloves, grated
2 1/4 teaspoons coarse kosher salt, or to taste
1 red chili or jalapeno pepper, seeded and roughly chopped
1 1/2 teaspoons ground cinnamon
1 teaspoon ground allspice
1 teaspoon black pepper
1/2 teaspoon sweet paprika
3 cups cooked spelt or other whole grain berries
1/2 pound lamb
2 tablespoons extra-virgin olive oil, more for frying (*I would use another kind of oil for frying – one that can take high heat like grapeseed oil or regular olive oil, for example.)
Lemon wedges, for serving
On another note, it’s my Mom’s birthday today! It is always a major bummer, to say the least, being so far from family. Some time ago, she took a bunch of old school slides and had them burned onto a disk so we could look through them. There are some amazing images. There are photos of the family, before I was even a thought in my parents’ minds, sitting around a television watching The Beatles’ first televised appearance and my mom meeting Lucille Ball outside of her house in Beverly Hills. Just for the outfits alone, these photos are priceless! So in your honor, Mom, here’s one of my favorites. Seriously, you should have been in an Alfred Hitchcock movie!
 Take Care and Happy Eating! And Happy Birthday, Mom!
Every week I compile recipes and ideas so that I have a guide, a dinner road map, if you will. Also, I try to create dinners that can turn into lunch for me throughout the week. Last week I got a little sidelined. We had a friend in town, which is always a great thing, and then I got sick, which is always a horrible thing. I take getting sick to a new level. When I get sick, I am down and out for the count. Here is what I made last week before I got sick. My recipe makes about 4 servings, and I love this because it’s so easy to throw a couple in the microwave during the week for a quick-lunch or dinner. The original recipe is from Food and Wine, http://www.foodandwine.com/recipes/stuffed-peppers-with-thai-curry-rice-and-mushrooms. I made some changes based on my likes. In the original recipe, it directs one to steam the peppers. In recipes like this, I prefer my peppers to not be soft. If you prefer softer peppers, see the original recipe.
Stuffed Peppers with Thai Curry Farro and Mushrooms
6 large red bell peppers, halved with cores and stems removed
2 tablespoons grapeseed or canola oil
2 medium shallots, minced
4 garlic cloves, minced
1 cup farro
1 cup unsweetened coconut milk
1 cup chicken stock
1 tablespoon fresh ginger, minced
1 tablespoon Thai red curry paste (NOT red curry sauce)
1 tablespoon of sambak olek (if you like more or less heat, adjust accordingly)
1 pound mushrooms, chopped (any kind you like works in this recipe)
4 cups spinach
1/4 cup basil, chopped
Salt and freshly ground black pepper, to taste
The recipes for this week in the Kopp household include:

I hope you give these recipes a try, and if you live around the San Diego area, try out Steak Night at Small Bar! Have a great week, and enjoy the Holiday weekend!
Take Care and Happy Eating!
We are well into 2015, and I finally got a chance to mentally take in the gifts I received over Christmas. So much is going on in my family, and in everyone’s family, over the month of December: traveling from one coast to another, traveling from one house to another, eating at, possibly, every new spot in Cleveland, Ohio, buying and giving gifts, sending and getting Holiday cards, carting Monsieur all over the country (kind of), dealing with a stolen wallet (fortunately that doesn’t happen every December), and the million other things that make up the busiest time of the year. It seems that with so many things going on, it’s easy to miss out on the things going on around us.
One of the gifts I received was Cooking Light Annual Recipes 2013 from my mother-in-law. I love these annual cookbooks. I get to pull out the old magazines I’ve been saving and transfer any notes of mine from the magazines to the cookbook, and then send the magazines off to a good home. It makes me feel so organized.
The note from the editor, Scott Mowbray, caught my eye from the October 2012 publication. “Sign of a food-centered family: During one meal, they talk about what the next meal will be.” Hmmm. This idea was brought up while he was interviewing Chef Ming Tsai. Chef Ming explains how important food was to his family, and his Dad would always take photos of the food they shared. Ahead of his time, right? Mowbray notes that we, hopefully, eat about 82,000 meal throughout our lives, and we should remember them. I would add to that point that we should respect them as well because meals are more than a plate of food in front of us. Think about a family meal – it indicates we are healthy enough to enjoy a meal, we have money in order to purchase what is in front of us, and we have loved ones surrounding us. Now being food-centered can turn a little crazy quickly, and we’ve all been there, too. For example, I’m sitting with my family at a restaurant for lunch and we start talking about what we will eat for dinner, or I’m out to dinner with friends and I start discussing lunch options for the following day with my husband. There is a fine line between enjoying a moment and taking it in and rushing through a moment in order to get to the next moment. I hope I take the time with each eating event, and I will be more mindful that I do so in the future. But this does not mean I will stop thinking or discussing the next meal! Again, it’s that fine balance between appreciating and anticipating. I think it can be done in a healthy way.
But this editorial note got me thinking: Is everyone like me, Chef Ming, and the Cooking Light editor? Does everyone think about the next meal while they are still seated at a table? Is this common? Of course I love cooking and eating, so every meal is usually an adventure for me. Why wouldn’t I look forward to the next one? And if you are reading this, you probably feel the same way about food. I would love to hear your thoughts on this one!
And in the spirit of thinking about the next meal, I’m listing the meals I made, and will make, this week for dinner. I’ve added the links so that you can easily access the recipe if you so desire.
Nutty Vegetable Sauté (http://www.meatlessmonday.com/recipes/nutty-vegetable-saute/) This was made over the weekend, but the leftovers have carried into this week’s lunch and dinner menus. I love when that happens!
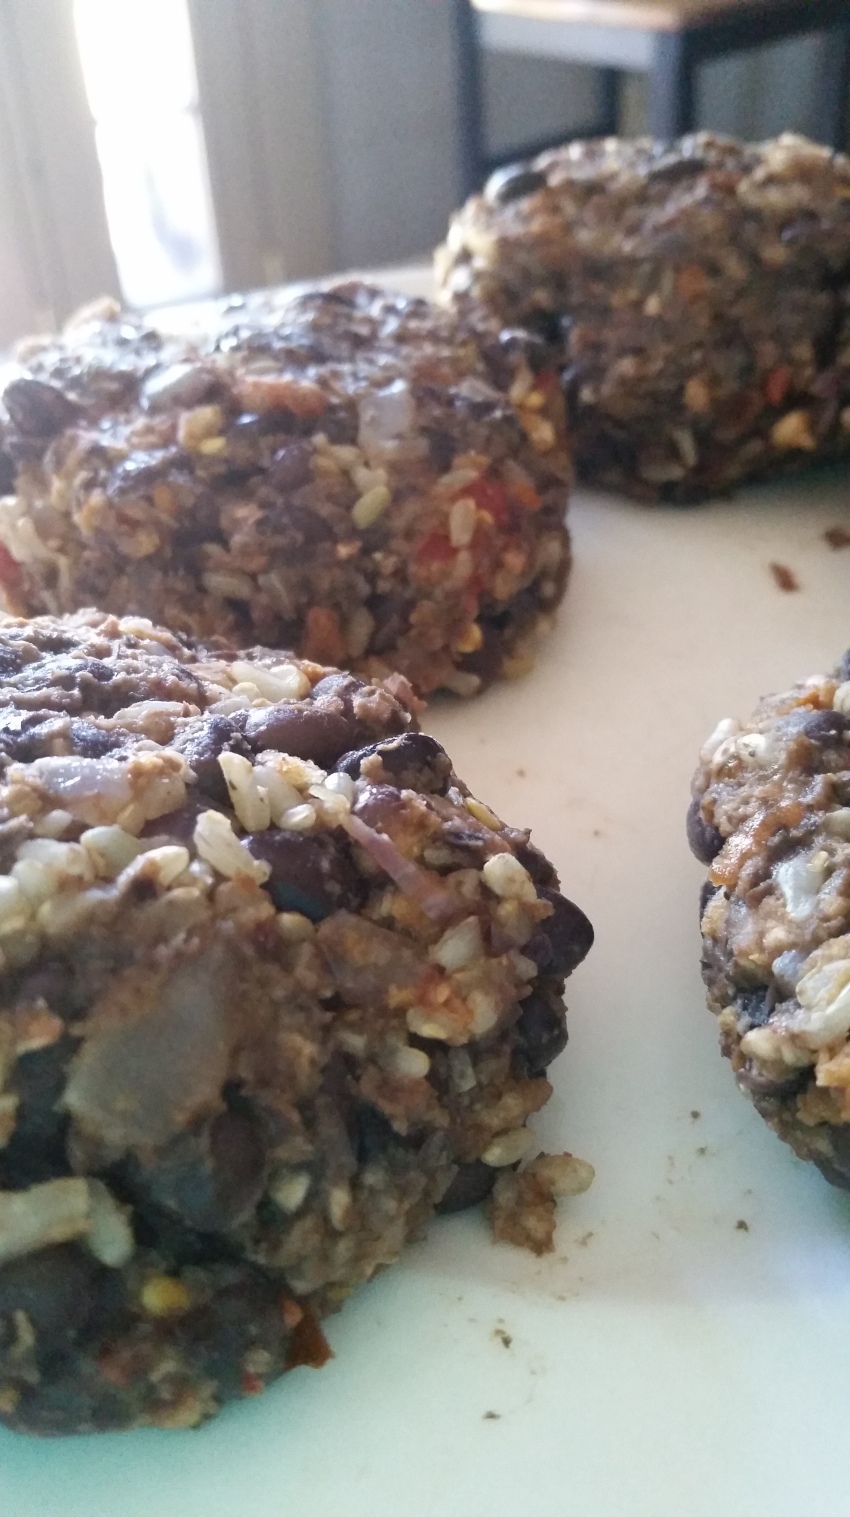
Spicy Lentil-Walnut Burgers (http://www.marthastewart.com/318248/spicy-lentil-walnut-burgers) served with Roasted Carrots. I was attempting to make a healthy “Burgers and Fries” meal for the viewing of The Ohio State v. Oregon football game. I served it with Chunky Olive Hummus from Trader Joe’s (YUM!) and Trader Joe’s Whole Wheat Flat Bread.
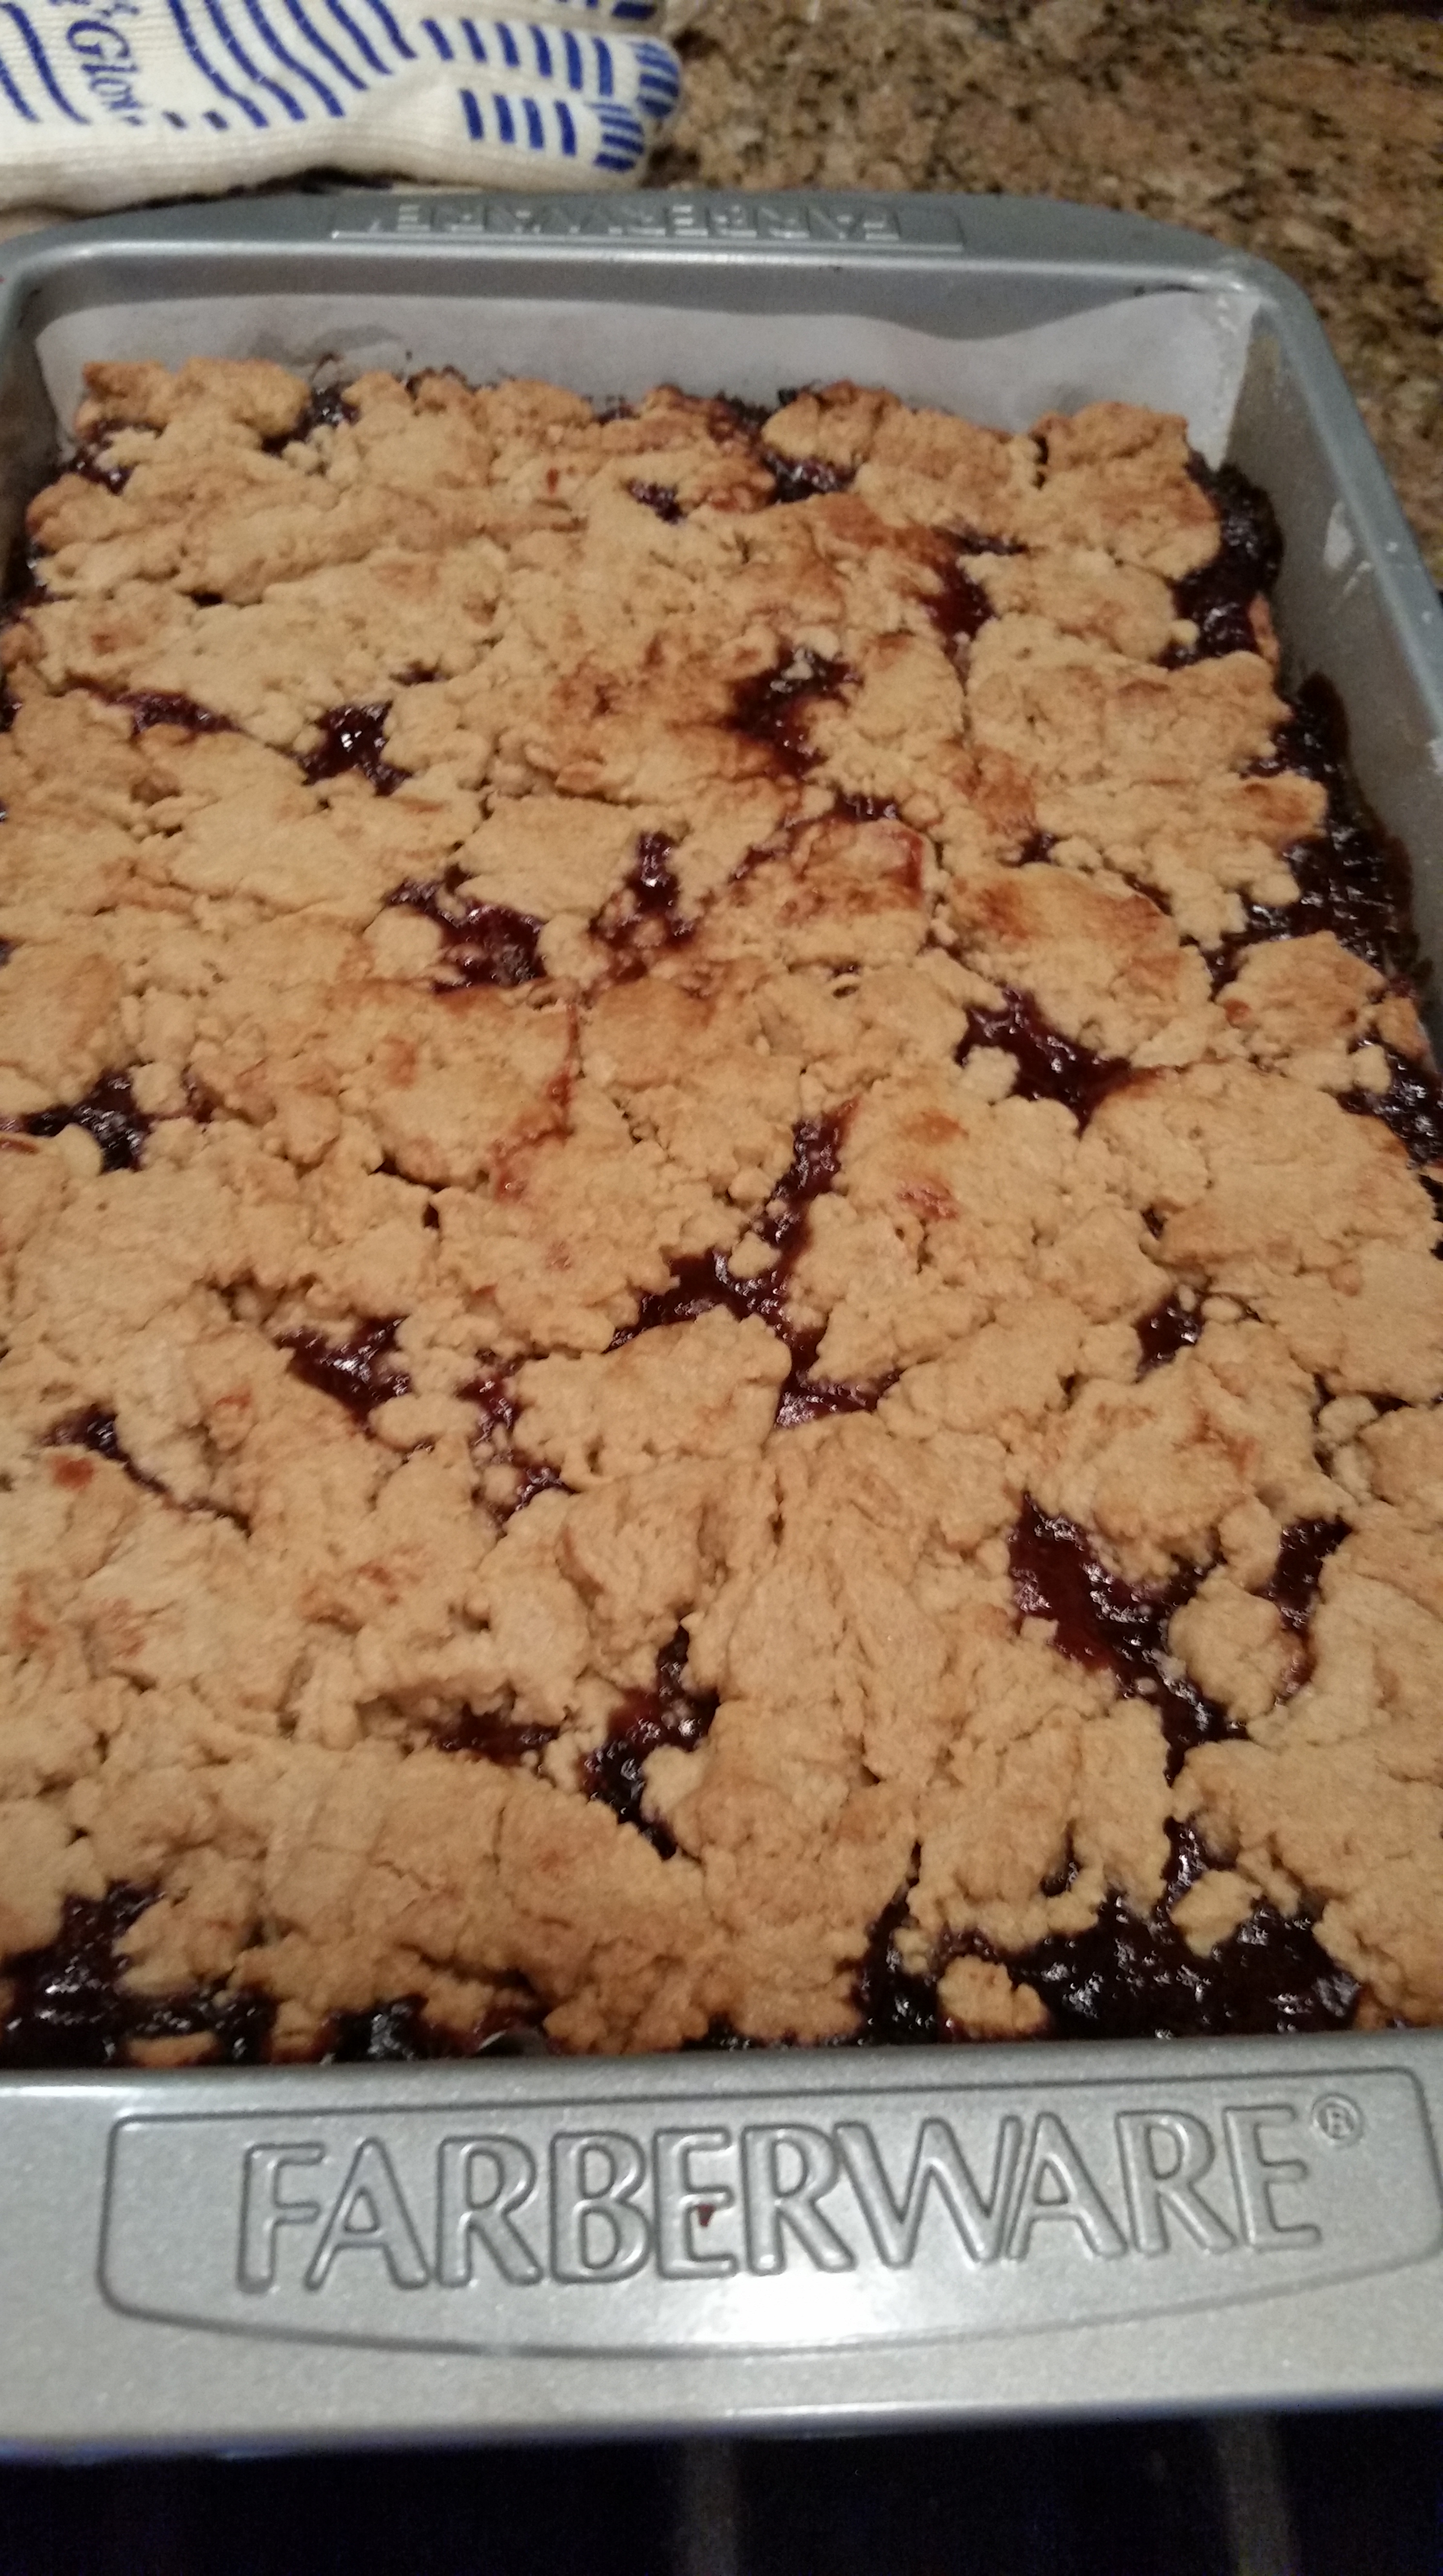
Peanut Butter and Jelly Bars (http://www.marthastewart.com/1065205/peanut-butter-and-jelly-bars) These were made as a half-time treat during the football game. This was followed by one Stone Enjoy By IPA (http://enjoyby.stonebrewing.com/) to celebrate the victorious OSU!
O-H . . .
Wild Mushroom Farro Risotto (Farrotto) (http://www.moreuncorked.com/!S0wXzFfbyV6LkYgba2nHpA!/Wild-Mushroom-Farro-Risotto-Farrotto) I omit the butter from this recipe and add more olive oil. I may add more than 2 ounces of goat cheese. Two ounces? HA!
Salad There is no recipe for this one. I usually make a salad most nights of the week. Occasionally the salad is the main course with a bunch of stuff in it, or I will make a simple one, like an arugula and red pepper salad. I grew up eating a salad with dinner most nights of the week, so I like the tradition – and it’s tasty!
Falafel-Stuffed Eggplant with Tahini Sauce and Tomato Relish (http://www.myrecipes.com/recipe/falafel-stuffed-eggplant)
Again, let me know your thoughts regarding the “Food-Centered Family”! I’d love to hear from you!
Take Care and Happy Eating!
OK, so my title is a little misleading. Let me start at the beginning. Melissa’s (http://www.melissas.com/) offered another challenge to the San Diego Food Bloggers. The timing was a little tough due to the craziness of the Holidays, and Melissa’s pushed our creativity to the next level. We had to use all of the ingredients and create two recipes: one savory and one sweet. I was on board. I can’t thank Melissa’s enough for giving us the opportunity once again. I received my complimentary box of goodies containing a one pound bag of Mandarin oranges, two Korean pears, bag of Baby Dutch Potatoes, steamed chestnuts, steamed baby potatoes, steamed beets, peeled and steamed baby potatoes, seedless grapes, and a cookbook all about Baby Dutch Potatoes.

I gave myself a few days to figure out the direction I wanted to go with all of the items. I browsed the cookbook I received. I had some ideas, and then my wallet was stolen. Aargh. I am still talking with different companies and the police, so my creativity took a little hit. I felt like grabbing a burrito at La Posta (http://www.yelp.com/biz/la-posta-de-acapulcos-san-diego-2) and a growler from Societe Brewing Company (http://societebrewing.com/) instead of cooking and writing.
I started with dessert. I needed something sweet! I decided to make a Korean Pear and Grape Pie. I had eaten a Korean Pear before, but I had no idea how it would bake. This is where the “Don’t Try This At Home” comes into play. The pie tasted really good, but it looked like a wet mess. So sad. Korean Pears are unbelievably juicy. Maybe that was where I went wrong. Maybe I needed to add more flour to the fruit mix, or maybe I should have sautéed the pears to extract some of the liquid? Let me know your thoughts! The produce was delicious, and the pie was really tasty, it just should have held together better. I wish I had more time to try this again, but time was short. I’m making sure to put “Time” on my wish list to Santa!
Korean Pear and Grape Pie
For The Crust:
For the Filling:

I opted for a contemporary Christmas tree vent.

It was even more watery. I had to drain it a bit.
Once I made my sweet tooth happy, I, shockingly, was in a way better mood to cook! With the remaining ingredients I created an entrée and a side dish that is so easy to make any night of the week. I usually am not a fan of chestnuts, but I LOVE them in this recipe. And I love beets, but they can kind of be a pain if you buy them fresh. I felt like I was cheating by having the beets peeled and steamed for me! No grabbing surgical gloves to avoid the red stained hands! Awesome!
Seared Five-Spice Chicken with Chestnuts, Beets, and Spinach Roasting on the Open Fire (Well, not really, but I was listening to Christmas music while cooking, so it just sounds right.)

Ginger Baby Mash Potatoes (No red-heads were harmed in the making of this recipe.)
I love these Baby Dutch Yellow Potatoes. The roast so nicely! I received the same potatoes from Melissa’s during the last challenge, and I couldn’t resist preparing them the same way, but I had to mix it up a little!

This was another fun challenge, and I can’t thank Melissa’s enough for the ingredients provided. Even though I received free stuff, all opinions are all mine! I can’t wait to see what other Food Bloggers created with these items! And I look forward to using the cookbook, but that might have to wait until after Christmas!
In case I can’t write again before the Holidays, I hope everyone has a fun, safe, and memorable eating experiences! Looking forward to writing many more posts in 2015!
And check out what other Bloggers created:
Take Care and Happy Eating!
Once again, Melissa’s Produce (http://www.melissas.com/) put San Diego Food Bloggers’ to another mystery box challenge. From my FedEx delivered box of goodies, and I had to choose at least 3-4 items from Melissa’s and incorporate 1-2 other ingredients, dealer’s choice (or in this case, cook’s choice). I could have gone in a few different directions, however, I was leaving for a trip to NYC a few days after receiving the package, so I knew I would need to make something freezer-friendly.


Click here to see what other San Diego Food Bloggers’ created: An InLinkz Link-up
Burgers and Fries (. . . For the Health Conscious and Flavor Seeker)

The Finished Product

I kept thinking of that commercial tag line “It’s In There!”
Making the accompanying fries, couldn’t be easier. Melissa’s sent my a 3 pound bag of baby Dutch Yellow Potatoes, and my husband and I finished them in 2 days. Nobody ever said we can’t eat. I simply rinsed and dried the potatoes. I left the smaller spuds whole, and I halved or quartered the larger ones. I placed them in a mixing bowl, drizzled olive oil over them (about a Tablespoon), and sprinkled them with fresh ground pepper and some salt. This really is about what you like. I like a lot of pepper and not too much salt, so I would suggest eyeballing it. Just remember you can always add more after they have roasted, but you can’t take any away! I place them on a parchment-lined baking sheet, cover them with foil, place in a 425 degree pre-heated oven, and wait until they have softened. Ovens can vary, so check them after about 20 minutes. Once they are soft, remove the foil cover and place them back into the oven. Roast until they are the golden color you prefer. Make sure to flip and move the potatoes around once while they are browning. This step will take about 15-20 minutes, depending on your oven.

I could eat these all day, every day!
Now, I can’t eat burgers and fries without ketchup, so I created a “Beanup”. All the hip restaurants opt out of the good old-fashioned stuff, so I am following suit!
Beanup

Sooo Good!
I received the items from Melissa’s, but no other compensation was given and all opinions are of my own. Thanks must be given to Melissa’s Produce! This was so much fun, and I appreciated a free box of delicious food items deliver to my door just so I could play around with it! Tonight I am using the Butternut Squash in an Arugula and Feta Salad for dinner. I can’t wait. Look for my post next week about my annual trip to The Big Apple. Funny, I never did have an apple while I was there!
Take Care and Happy Eating!
